Last time, I left off with the basic hull completed. Now comes the detailing.
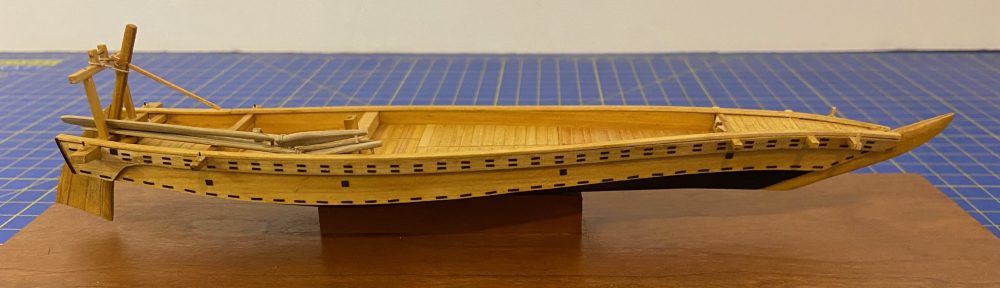
A pair of beams are provide which are attached directly on top of the upper hull planks. These are first tapered from underneath so that at the ends they are reduced to half thickness. The fore beam referred to here as the ツノ or Tsuno (tsue-no), and the stern beam is the オオトコ or Otoko (oh-toe-koh). The heavy stern beam in particular is a common feature of traditional Japanese boats as it is used to mount the rudder on some boats, and usually bears the seat for the sculling oar.


One thing you might note about these beams is that the parts are made from a lighter colored wood. True to the original boat, instead of the Japanese Cedar used for the hull planks, these parts were usually made out of Hinoki (Japanese Cypress) because its greater density and strength.

At this time, there are some extension pieces located at the midships frames (I was calling them beam initially, but now they’re built-up high enough to call them frames or bulkheads). I don’t know what it’s called yet, but this boat has an extended rail outside of the hull and these pieces are the central supports for it.
These small pieces initially had a lot of char from the laser cutting on top and bottom. I was as careful as I could be to not take off too much material. But, the cedar is relatively soft and it sands a little too easily here. But, I seemed to manage okay and essentially got the char off.
By the way, something interesting about that space between the frames that you see in the photo. In the center portion of the hull bottom, there are a few holes. I believe that this might have served as some kind of “live well” that must fill with water through those holes. There are in fact, two sets of holes. Near the forward bulkhead, there are two smaller holes in the bottom, and I believe these open into a smaller, separate section that might have been for storing bait. I’ll report on this at another time after i’ve collected some facts.
So, next step was to add the upper and lower slotted beams, which will hold removable doors to allow access into the bow and stern storage compartments. The ends of the beams had to be sanded down to fit nicely in place.

A special template is provided to make sure that the beams are properly aligned. One side of the template is used for the bow and the other side is used for the stern. The angles are different enough so that it’s pretty obvious which side is used for which end of the boat. You don’t need to read Japanese to figure that much out.


One of the issues I ran into was that the tops of the upper hull planks weren’t perfectly aligned. So, I made an extra effort to make sure the gap between the upper and lower beams was consistent.
After the stern pieces were done, I assembled the floor of the bow storage compartment. Interestingly enough, the two pieces that make up the floor aren’t two symmetrical halves. In fact the joint between the two doesn’t even run parallel to the centerline of the ship. You can see what I mean when you look at the photo.

I’ll cover the completion of the holds next time. The next step is to add the deck beams to the bow compartment and then the add the bow and stern decks.

Thank you for your nice tosa wasen building blog.
I am a friend of Thermal studio.
I was studying the wasen building under very old wasen builder Mr.Hiromitu.
We built the 20 shaku (feet) wasen.There is a photo in the building manual.
I draw the plans of the wasen and Mr.Tanimura at Thermal studio made this kit.
Please come to my blog and FB.
芝藤敏彦
土佐和船友の会
http://www.facebook.com/tosawasen?success=1
和船船大工弟子入り日記
http://wave.ap.teacup.com/wasennfunadaiku/
LikeLike
Hello Toshihiko-san. Thank you for reaching out and for the links to your blog and to the Tosa Traditional Boat Society page. You must have done exceptional work because the Tosa Wasen kit is an exceptional product!
LikeLike